Various hand tools and power tools, such as miter saws, band saws, and circular saws, are manufactured by the Ridgid Tool Company.
Miter saws come in handy if you’re looking to cut wood in complex angles.
Professional carpenters use these to cut wooden structures with precision. You might want to know how to change the blade on a Ridgid miter saw.
The first thing to do while looking to cut material is to change the blade as per the type. Also, it becomes necessary for you to change the blade if it gets dull.
It is simple to change a blade on a Ridgid miter saw, but if you’re unfamiliar, it can be daunting. Since sharp blades are required for accurate cuts, avoiding severe injuries during their use is also vital.
Hence, this article will guide you through the step-by-step process of replacing the old blade on your Ridgid miter saw with a new one.
If you stay till the end, you’ll find out how to replace the old blade with the new one.
So, let’s begin!

Step-By-Step Guide on How to Change the Blade on a Ridgid Miter Saw!
This portion of the article guides you step-by-step through the process of replacing the old blade on a Ridgid miter saw with a new one.
You can even find a detailed explanation of each step to execute the process yourself.
Below is the step-by-step guide on how to change the blade on a Ridgid miter saw.
1. Cut Off the Power Source & Unplug the Miter Saw
The first step to take while changing the blade on a Ridgid miter saw is to disconnect the power source and unplug the miter saw.
You can get an electric shock if you unplug your miter saw before cutting off the power supply.
So, firstly make sure the power supply is turned off before unplugging the miter saw.
Then, unplug the miter saw and ensure it is free from extension cords.
2. Lock the Miter Saw into the Saw Table
The second step to take while looking for how to change the blade on a Ridgid miter saw is to lock the miter saw properly into the saw table.
Also, ensure the blade is in its correct position and locked in place before using it.
That can be achieved only by locking the miter saw into the saw table. Hence, make sure the locking knob is tightened by adjusting the saw table to 90 degrees.
After adjusting the saw table, fix the saw’s bevel at an angle of 90 degrees and then lock it.
3. Unlock the Motor Spindle Lock
The third step while replacing the blade on a Ridgid miter saw is to unlock the motor spindle lock.
For that, press the motor spindle lock and hold it.
But where exactly is the motor spindle lock located? The motor spindle lock is actually a lever on the side of the saw motor, located behind the blade guard.
4. Loosen the Blade Spindle Bolt & Remove it
The fourth step to take while replacing a blade on a Ridgid miter saw is to loosen the blade spindle bolt and remove it carefully.
But again, where is the blade spindle bolt located? You can find this bolt located at the back of the blade.
So, firstly loosen the spindle bolt. For this, you need to turn the spindle bolt in the counterclockwise direction. You can use an adjustable wrench or a Ridgid saw blade wrench that comes with the machine itself.
Finally, remove the bolt and outer washer.
Related article: How to Change Blade on Skilsaw Circular Saw? | 8 Practical Steps!
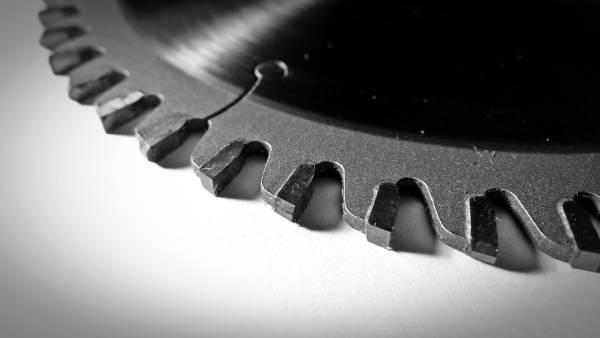
5. Remove the Saw Blade
The fifth step to take while looking for how to change the blade on a Ridgid miter saw is to remove the old saw blade.
Without removing the old saw blade, you can’t replace it with a new one (duh!).
The saw blade rests on the spindle shaft, which a saw blade guard further guards. So, retract the saw blade guard and carefully remove the saw blade away from the spindle shaft.
6. Place the New Saw Blade
The sixth step is to install the new saw blade.
So, install the new blade on the spindle shaft by looking at the direction arrow indicated in the saw’s blade cover.
Place that arrow in the same direction as the arrow of the blade.
Also, replace the old blade washer with a new one located over the spindle shaft.
7. Insert the Blade Spindle Bolt
The next step is to insert the blade spindle bolt to tighten the new blade. For this, you need to insert the spindle bolt into the spindle.
8. Tighten the Blade Spindle Bolt
The eighth step to take while looking for how to change the blade on a Ridgid miter saw is to tighten the blade spindle bolt.
After inserting the spindle bolt into the spindle, tighten the bolt securely by turning it clockwise.
You can use a Ridgid saw blade wrench or an adjustable wrench.
Watch this video to find out how to change the blade on a Ridgid miter saw:
Conclusion
As you’ve seen above, this article is a step-by-step guide you can follow to change the blade of a Ridgid miter saw.
It is a simple process, but with our guide, it becomes effortless!
Changing the blade is necessary as it gets dull if used frequently. However, make sure it truly needs replacement before changing the blade. Also, use a blade cleaner to clean the blade and wear gloves while changing the blade to reduce the risk of injury.
We hope this step-by-step guide gives you the exact knowledge of how to change the blade on a Ridgid miter saw.
If you have any queries, do let us know in the comments. Also, share this article with your friends and family.
Thanks for reading!