Repotting an orchid differs from repotting a ‘typical’ houseplant in a few ways. That’s because most orchids are epiphytes, or “air plants,” that grow up high and cling to trees and other structures.
Terrestrial plants, or those that grow from the ground, are the most common houseplants. A different type of root system is required to grow from the ground or in the air.
Because air plants require a lot of air movement around their roots, they would perish if planted in the earth. Repotting orchids varies a lot from repotting ‘regular’ houseplants. Therefore, this article will discuss how to repot an orchid with air roots.
If you’re an orchid gardener, you’ve probably noticed roots pushing through the earth beneath your lovely blossoms. Aerial roots are frequent in some orchids, and some growers may tell you that this indicates that you need to repot your plant.
Orchid caretakers must repot their orchids after 1-2 years; therefore, it is essential to learn how to do it correctly. There are a few guidelines to follow, but it’s really simple once you get the feel of it. And it’s even enjoyable!
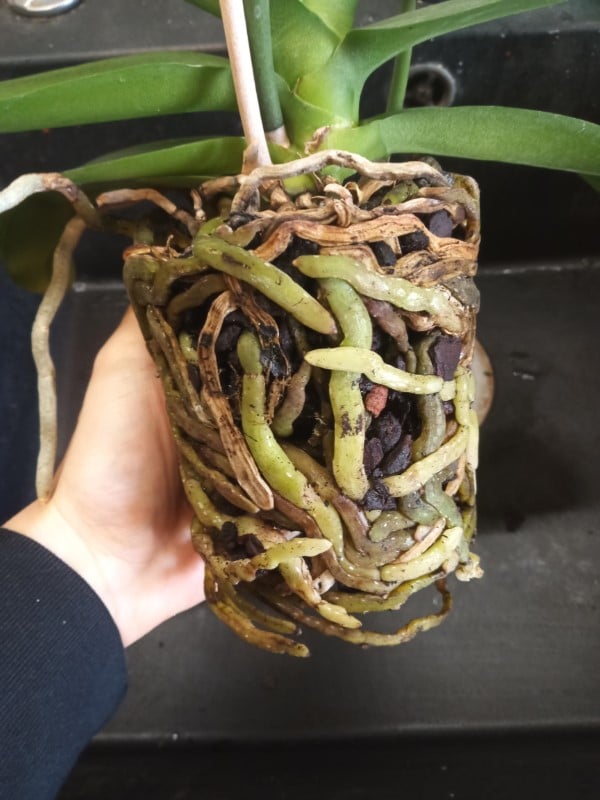
Orchid roots that develop outside the potting medium are aerial or air roots. Aerial roots are a frequent mechanism for orchids to absorb moisture and nutrients while anchoring themselves to trees in their natural tropical habitat.
Orchid air roots, which mostly linger on the outside of the orchid pod, suggest that your houseplant is in great health; hence pruning or burying them is often discouraged.
Some epiphytic orchids suspend their roots in the air to gather water from the rain, atmosphere, and water that spills from the leaves above them. Others spread their roots across tree branch surfaces, absorbing water or other nutrients as they drip off the branches.
- How To Repot An Orchid With Air Roots: A Step by Step Guide
- Step 1: Take the Orchid out of its pot
- Step 2: Get rid of the old potting medium and determine your new container.
- Step 3: Rinse the Roots using Lukewarm Water
- Step 4: Cut off the Bad Roots
- Step 5: Spray the remaining roots with Hydrogen peroxide 3% Solution
- Step 6: Dip in Water and Root Powder
- Step 7: Prepare the New Container
- Step 8: Add Bark Medium to Pot and Fill with Soil Mix
- Step 9: Place the Orchid in Bright Shade and Keep Moist Until Rooted
- Final Remarks

How To Repot An Orchid With Air Roots: A Step by Step Guide
Step 1: Take the Orchid out of its pot
- Use old newspapers or other materials to cover the surface you’re working on.
- After you’ve watered orchids, make sure they drain well. You want to start this orchid repotting process with freshly watered plants. The reason is that the drying-out will help you unroot your orchid much faster.
- Avoid plant sections that can break easily (such as new aerial roots and probable flower spikes) by finding a sturdy and firm spot to hold it from.
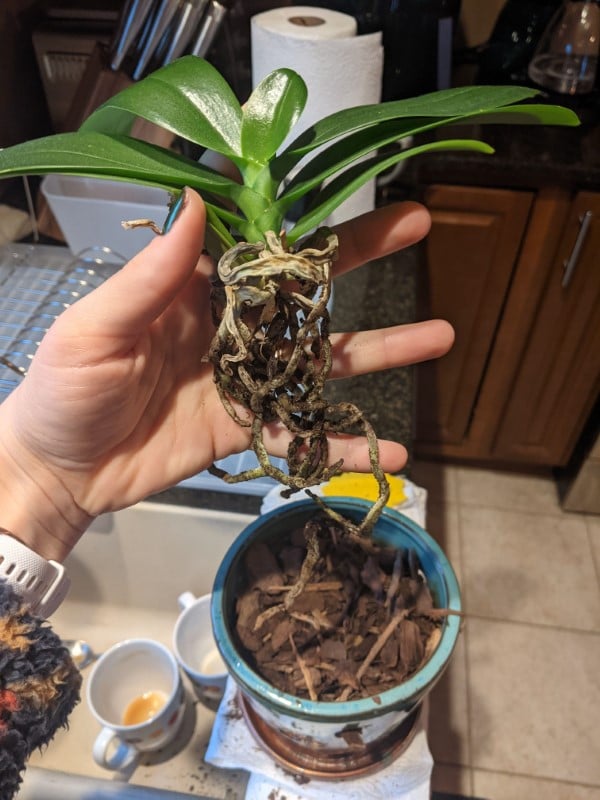
- Pull the orchid out of its former pot with care. If the roots are stuck to the pot, wriggle them gently to free them.
- To get ready for repotting, prune back the roots of your plant. Ideally, you should only do this when the orchid is in active growth.
Step 2: Get rid of the old potting medium and determine your new container.
- The next step in learning how to repot an orchid with air roots is to take the old potting medium away.
- While you were removing the orchid from its pot, some of the old potting media most likely spilled out.
- Remove the remaining roots by gently shaking and touching them to loosen up the old media. If any bark fragments appear to be extremely difficult to remove without injuring the root, let them alone for the time being.
- Clean the roots as thoroughly as possible now, removing any loose particles. When touching the roots, take your time and be gentle.
- Don’t forget that you should cut off any dead roots at this stage.
- Use a chopstick, pen, pencil, or skewer to poke around the medium to determine whether it has any dead roots. Cut them off at their base with a clean, sterile knife or scissors if you find some.
- You need to choose a bigger container for the larger plant than the last pot. You should also make sure that it has been washed and sterilized.
- Place some orchid bark at the bottom for drainage when you decide on a container.
Step 3: Rinse the Roots using Lukewarm Water
- Give the roots a good rinse underneath a running tap with lukewarm water now that they’ve been washed from the old potting medium. It’s only to clean things up and make them a little more flexible.
- Avoid getting water in the crown of the plant; nevertheless, you can dry it with tissue paper if this happens.
- Place a corner of the paper between the leaves where the water has leaked and hold it there until it is sucked out. If necessary, repeat until dry.
- If some old bark pieces were ‘glued’ to the roots and wouldn’t come off after rinsing, immerse the roots in lukewarm water for a few minutes — this generally helps eliminate even the most obstinate bits. To begin, soak for 10-15 minutes to check if that works. If necessary, extend the time.
Step 4: Cut off the Bad Roots
- Now that the roots are lovely and clean, it’s time to check the root condition. This will help you understand how to care for your orchids.
- However, all of the mushy or dry roots must be clipped away.
- Using a pair of scissors/pruners sterilized with 3 percent hydrogen peroxide, clip out the unhealthy roots one by one.

Step 5: Spray the remaining roots with Hydrogen peroxide 3% Solution
- Use a medicinal dropper to add 2-3 drops of hydrogen peroxide 3% solution to 1 liter of water. You can use any medicine dropper with the ‘graduated markings,’ even an oral syringe. These are available at most drugstores.
- For faster re-rooting, dip the roots in a bucket of hydrogen peroxide solution (use the same ratio as above) for 10 minutes.
- The use of hydrogen peroxide is the quickest way to solve bacterial problems on your orchid’s roots. Bacteria can be deadly for your new plant, so avoiding this is important.
- If you do not have hydrogen peroxide, you can use fungicide instead to wipe the roots clean and then soak them in lukewarm water for a few minutes.
Step 6: Dip in Water and Root Powder
- Fill a bucket with clean lukewarm water and add a teaspoon of root powder or any fungicide (if you did not use one earlier).
- Dip the roots in the bucket for 5 minutes.
Step 7: Prepare the New Container
- Put a thin layer of orchid bark at the bottom of your new pot for drainage.
- Next, place the plant in the pot and add more bark if necessary.
- Then gently shake the soil from the roots and spread them out in the pot.
Step 8: Add Bark Medium to Pot and Fill with Soil Mix
- Using your fingers, push bark medium around the roots.
- Use a chopstick or pencil to make sure the medium has reached all of the spaces between the roots and that there are no air pockets.
- Now fill the rest of the container with pre-mixed orchid potting soil. Wiggle the chopstick to dig into the hard parts and create more space for roots.
- Fill it about halfway, add some water and let the bark medium soak it up. And add more bark medium.
- Then add water again and fill the pot to the top with bark medium. After adding the water, this medium should be wet but not dripping.
Step 9: Place the Orchid in Bright Shade and Keep Moist Until Rooted
- Place the orchid in a shady spot away from direct sunlight and keep it moist.
- Avoid putting your newly potted orchid under bright, hot sun because its leaves will burn.
- Keep it in this place for a week or two to give the roots time to become established in the new pot.
- Within this time, the roots will grow faster if they are misted with lukewarm water daily or soaked in a bucket of lukewarm water for 10 minutes.
- Check the bark medium daily, and if it feels dry, moisten with lukewarm water. Make sure you do not overwater your orchids.
- Orchids love humidity, but this is a little difficult since it’s usually the dry season. You can place a small water bowl near the plant to increase humidity.
- In almost no time, your orchid will sprout new leaves.
- Now you can move your new plant to a brighter spot that gets indirect sunlight. It may need a few more weeks before it looks full.
Final Remarks
The main objective for repotting an orchid is to safeguard the root development from the potting medium degrading. Although root overcrowding is a possibility, it is not the cause of air roots.
These epiphyte orchids have aerial roots as a natural characteristic. Because their major job is to extract nutrients and water from the air, they should not be placed in a pot.
However, the growing medium in which we put orchids is particularly prone to generating root rot or infected roots.
The reason for replacing the pot is to replenish the sphagnum moss, orchid bark, charcoal, and other materials. If you see fungus or illness while repotting, it’s a solid indication that you have rotting roots!
Now that you know how to repot an orchid with air roots, you must repot it for all of the above reasons. As an added advantage, it can aid in producing encore blooms.