The cantaloupe plant has earned its rightful place as a beloved summer fruit with its vibrant orange flesh, sweet aroma, and refreshing ripe melon taste.
Yet, behind its luscious netted exterior lies a fascinating journey of growth and fruit development lasting more than 85 days. The cantaloupe growing stages are divided into many parts, each with its own requirements and demands.
In this blog post, we will embark on a captivating exploration of the enigmatic world of cantaloupe growth stages as we unravel the secrets behind this summer ripening fruit.
From the delicate flowering stage, where nature’s proper pollination works its magic, to the fruit production stage, culminating in the precise moment of harvest and post-harvest care.
So, stay with us till the end!
- How Long Does It Take for Cantaloupe to Grow?
- Growth Stages of Cantaloupe Plants!
- Post Harvesting Preservation of Cantaloupe!
- Factors that Can Affect Cantaloupe Growth Stages!
- Guide to Planting & Growing Cantaloupe Seeds!
- 1. Start Cantaloupe Seeds Indoors
- 2. Choose a Suitable Location for Your Seedlings
- 3. Prepare the Soil for Planting Cantaloupes
- 4. Plant Your Cantaloupe Seedlings
- 5. Provide Adequate Water to Cantaloupe Vines
- 6. Mulch the Soil Around Your Cantaloupe
- 7. Fertilize Your Cantaloupes Regularly
- 8. Control Weeds Growing Around Your Plant
- 9. Monitor for Pests and Diseases
- 10. Harvest the Fruit at the Right Time
- Conclusion!

How Long Does It Take for Cantaloupe to Grow?
Understanding the time it takes for cantaloupe seeds to grow into delicious, sweet fruit is key to ensuring your melons are perfectly ripe at the harvesting stage.
Generally, cantaloupe seeds take about 80 to 100 days to produce fruit.
But hold on! Because many factors can shake things up.
Guess what?
The time of year you decide to plant your cantaloupe seeds into the soil can significantly speed up their fruit development.
If you go for it in early spring or summer, when the ground is warm and the air is all humid and cozy, you’re giving your growing cantaloupes a turbo boost on their fruit development.
And hey, here’s a cool trick!
Using fertilizers and other growth-friendly treatments can seriously trim down the time for these cantaloupes to mature fully.

Cantaloupe Mushmelon Melon | Image via Pixabay
Growth Stages of Cantaloupe Plants!
Growing cantaloupes involves many growth stages discussed in great detail.
Read carefully to learn how to properly nurture and harvest cantaloupes.
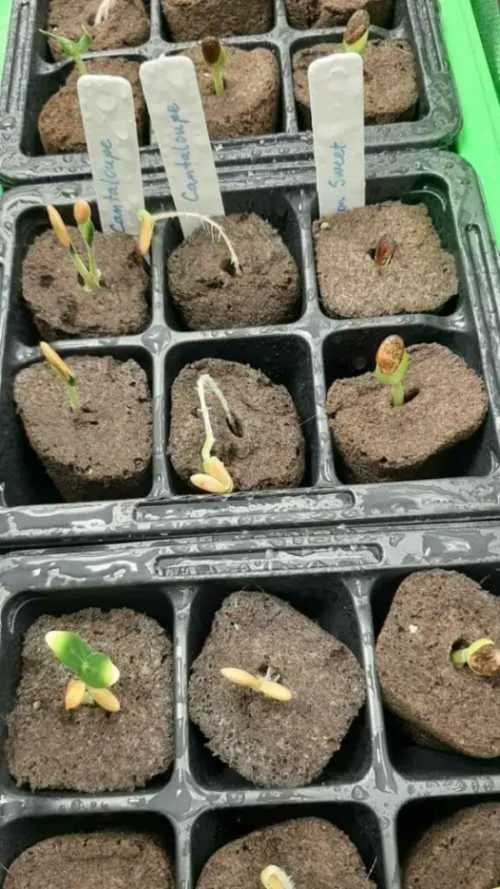
Stage 1: Seed Stage
Every cantaloupe seed contains complete genetic coding and DNA information, which will determine the looks, shape, and health of the plant; therefore, save cantaloupe seeds that look good and are healthy.
When it is just a seed, it is inactive and dormant and needs particular surroundings to reach the germination stage.
So, to help the seed germinate faster and more efficiently, gently scratch the seed shell with the help of a filer or sandpaper. This step in growing cantaloupe plays a vital part by creating a passageway for water and nutrients inside the shell, making absorption easier.
Now this scratched seed is ready to be planted and germinated.

Related Article: How To Save Cantaloupe Seeds in 10 Easy Steps (growgardener.com)
Stage 2: Planning the Seed
To plant your cantaloupe seeds, buy some compost or some aged manure and add it to the soil, as these plants are very heavy feeders.
Now you must plant the seeds at least one inch deep in the soil.
Cantaloupes grow well in moist soil conditions, so ensure you provide water to the plant consistently. But make sure that they do not get waterlogged and that there is a good drainage system so that they can flourish.
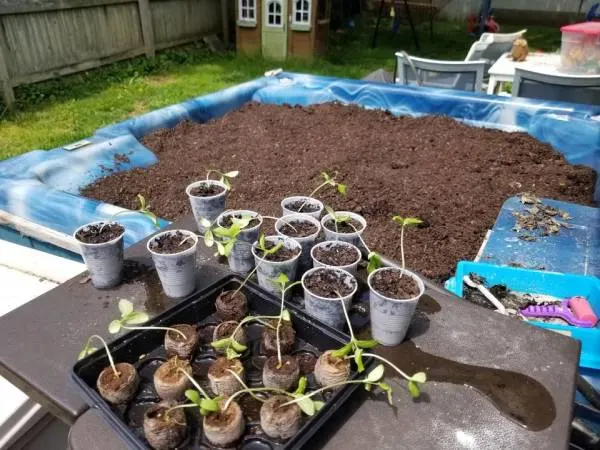
In addition, these plants can be planted indoors in trays, and once they turn into seedlings, you can plant them in your garden.
On the other hand, if you want them to be planted in your garden right away, leave some space between each seed, approximately 90 cm or 30 cm for the trellis.
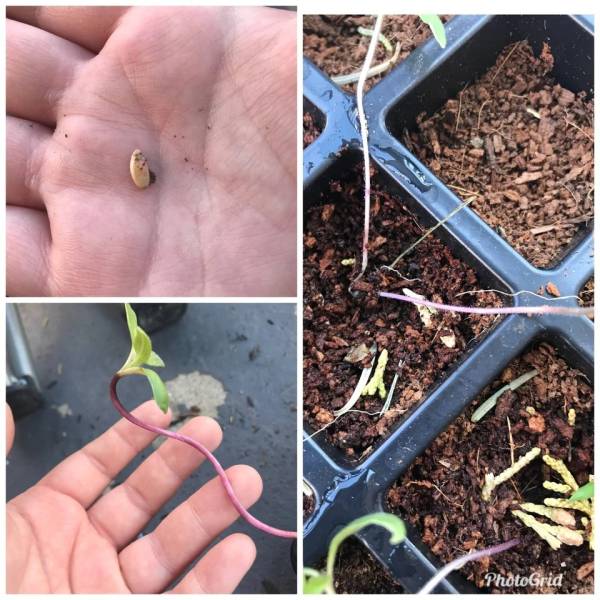

Stage 3: Germination
The germination process takes roughly 10–7 days after the seedlings start to appear on the soil’s surface. The soil temperature during this process needs to be between 21–25 degrees Celsius (75–80 degrees Fahrenheit)
During this crucial stage, the freshly grown seedling starts to develop.
First of all, the roots start to form, and then the leaves follow.
The plant should be placed in a fairly warm and sunny spot and provided with good air circulation, as this stage sets the base for the plant.
You can start digging in some fertilizer with the soil at this stage so that the seed can get all the necessary nutrients it needs to stay happy and healthy. You can use 10–10–10 fertilizer, but be cautious so as not to overfertilize the fragile seedlings, which can cause immense damage.
Fertilize the cantaloupe once a week according to the instructions given on the package during the growing season.

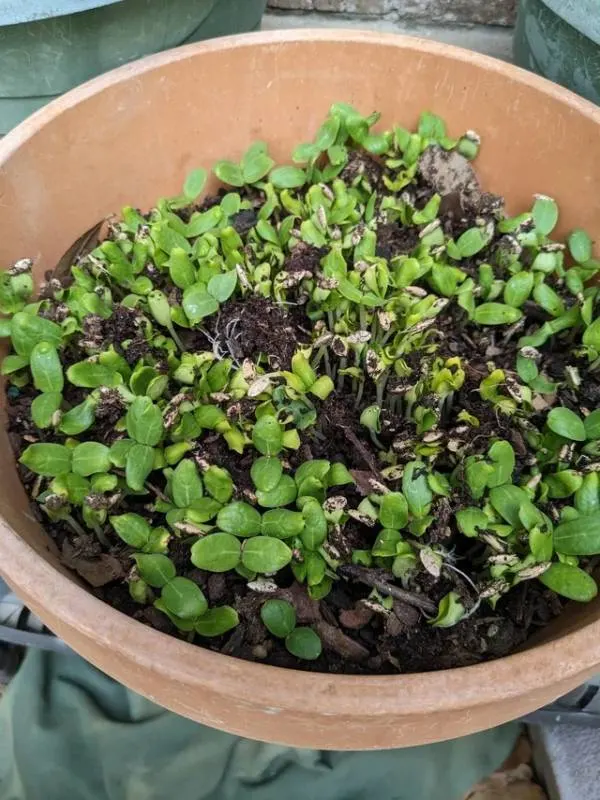
Stage 4: Seedling Stage
Now that the root system has been established and the first true leaves have been formed, we have reached the cantaloupe seedlings stage.
If you have grown them in a tray, it is time for these baby seedlings to be transferred to a larger container so that they can grow to the fullest. Do this process very carefully so as not to injure their roots, causing stunted growth in the same plant.
Cantaloupe, on average, requires almost 8–10 hours of sunlight, so deciding on the perfect sunny spot for your plant is absolutely significant.

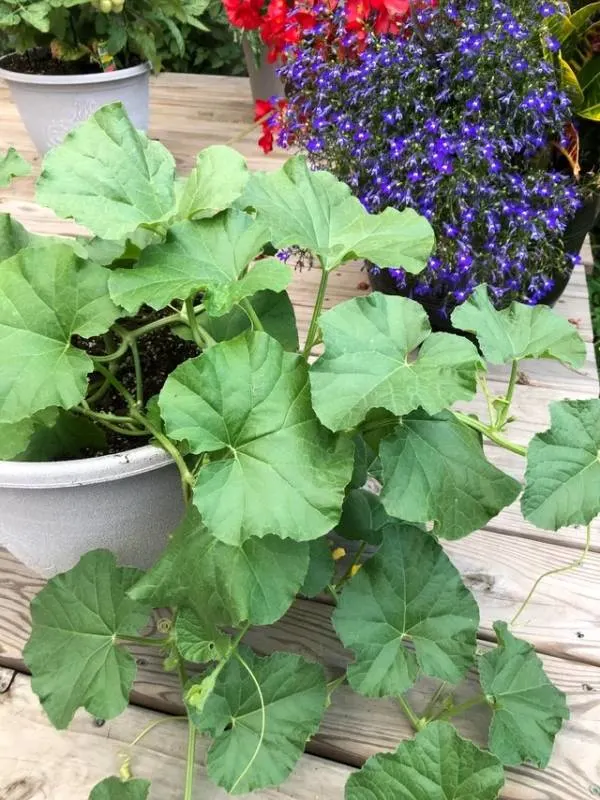
Stage 5: Vegetative Stage
It can be observed that the cantaloupe has entered the vegetative stage when the leaves, branches, and stems start to grow.
From here on, the growth of the plant will pick up, and it will be a speedy process. So, to keep this growth up, it needs the right amount of light, nutrients, water, and air.
For watering your plant, use the thumb rule to check if the soil needs water. Or, keeping in mind the conditions, deeply water your cantaloupe plant once or twice a week.
In addition to water, the plant also needs nutrients, which will help it grow well.
In this vegetative stage, nitrogen is mandatory for its quick growth. So, use a balanced fertilizer that is high in nitrogen content.

Stage 6: Flowering Stage
The flowering stage is a critical phase in the life cycle of a plant.
Cantaloupes have separate male and female flowers on the same plant that produce fruit together.
During this stage, the cantaloupe plant produces male flowers and female flowers, which contain the reproductive organs necessary for the formation of fruits.
Flowers are pollinated, with the process of pollination usually facilitated by bees and other pollinators attracted to the flowers’ nectar and bright colors. As the pollinators move from flower to flower, they inadvertently transfer pollen, allowing fertilization to occur.
Environmental factors such as temperature, light, and nutrient availability can influence the timing and intensity of flowering. Adequate sunlight and warm temperatures are generally favorable for flowering.
As for nutrients, this stage demands less nitrogen and more potassium, as well as phosphorus.


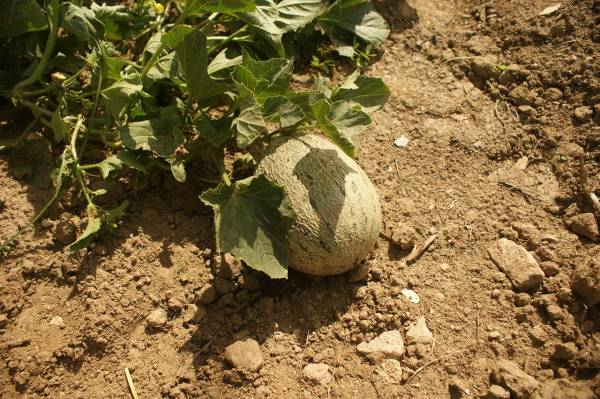
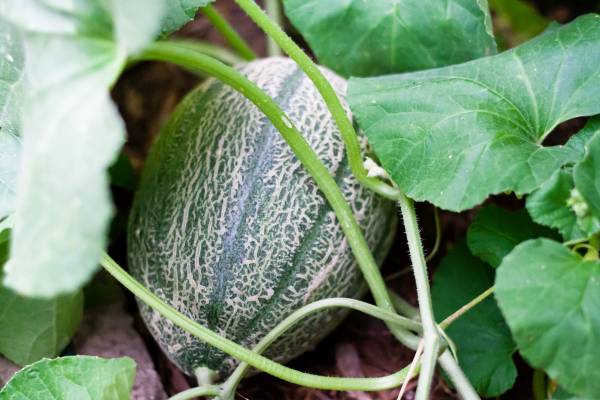
Stage 7: Fruit Formation
After receiving pollen from male flowers, the fertilized female flowers develop into fruit.
During this stage, the cantaloupe fruit relies on the plant for water, nutrients, and sunlight.
Adequate water should be provided to the plant as the fruit grows because it helps keep it moist. Otherwise, it gets cracked, dried up, and turns out to be bitter. On the contrary, too much water will cause the fruit and the root to rot and cause damage.
Sunlight is another important element in the fruit formation stage, as the presence of sunlight encourages the cantaloupe fruit to ripen. It is said that the sweetness of the fruit depends upon the provision of sunlight; hence, it is important that it gets a minimum of 6 hours of direct sunlight.
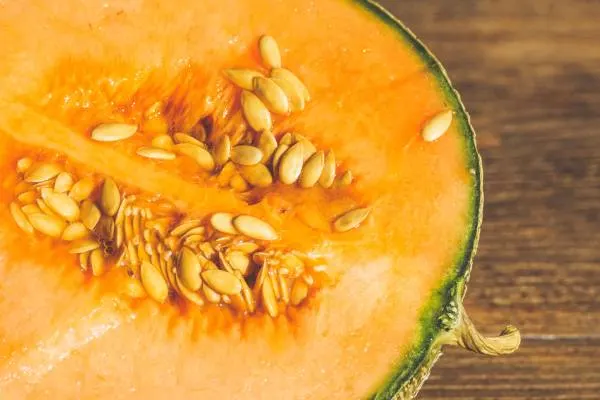
The fruit gradually increases in size and develops the characteristic netted skin texture typical of cantaloupes. The internal flesh of the ripening fruit becomes juicier and sweeter.
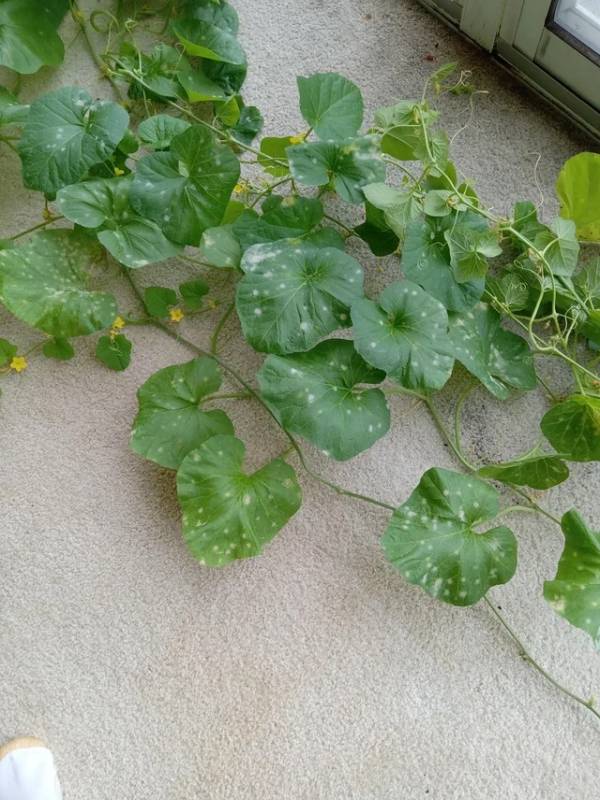
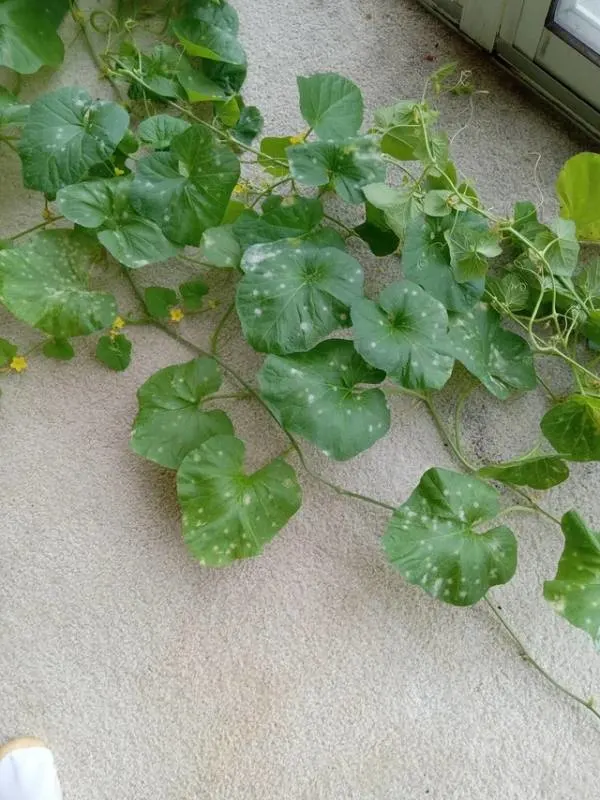
But this stage can also attract uninvited pests like spider mites, aphids, and white flies. Diseases like downy and powdery mildew can also infect the cantaloupe. These situations could be kept under control if good care and regular inspection are taken.
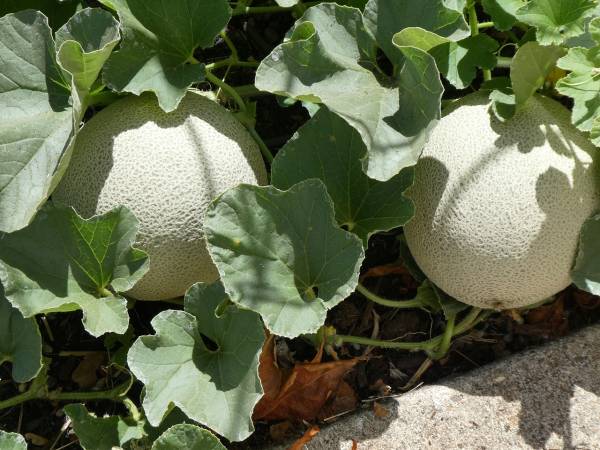

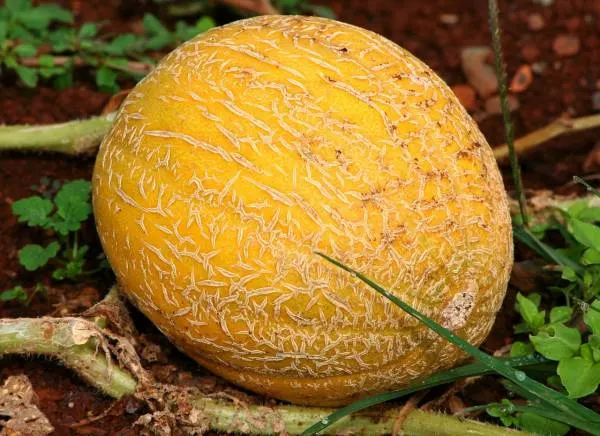
Stage 8: Harvesting Stage
Now, it’s harvesting time!
Once the cantaloupes reach maturity and are fully ripe, they are ready to be harvested. The timing of the harvest is important to ensure optimal flavor and quality. Harvesting cantaloupes too early may result in underripe fruit, while waiting too long can lead to over-ripeness and reduced shelf life.
Several indicators can be considered to determine if a cantaloupe is ready for harvest, like:
Golden or orange skin color, depending on the variety.
The sweet aroma of the fruit.
When the fruit comes off the stem easily.
Gentle pressure on the blossom end should yield slight give or softness without being overly mushy.
When harvesting, it’s crucial to carefully cut the cantaloupes from the vine, leaving a short stem attached to the fruit.
It’s recommended to use sharp, clean tools for harvesting to minimize potential damage.
These were all the growth stages of cantaloupe fruit.
Post Harvesting Preservation of Cantaloupe!
After harvesting, proper post-harvest handling of ripe cantaloupe is essential to maintain the quality and extend the shelf life of the cantaloupes.
They should be handled gently to avoid bruising or puncturing the skin.
It’s advisable to store them in a cool, dry place, such as a refrigerator, to slow down the ripening process. However, consuming ripe cantaloupes within a few days is best for optimal flavor and freshness.
Factors that Can Affect Cantaloupe Growth Stages!
Several factors can significantly impact the successful growth and development of cantaloupes.
Understanding these factors is crucial for optimizing cultivation practices and achieving desirable yields.
Here are some key factors that affect cantaloupe growth:
Climate and temperature
Soil quality
Watering and irrigation
Pollination
Nutrition management
Sunlight and wind circulation
Cultivar selection
Pests and diseases
Now that you know all about the cantaloupe growth stages, let’s see what is the best way to grow cantaloupe.
Related Article: How To Grow Cantaloupe In Container? 6 Things To Note (growgardener.com)

Guide to Planting & Growing Cantaloupe Seeds!
Growing cantaloupe can be a rewarding experience.
These sweet, juicy fruits are a very delicious fruit addition to your home garden.
To successfully grow cantaloupe from seeds, follow these detailed steps:
1. Start Cantaloupe Seeds Indoors
Starting cantaloupe seedlings indoors is a smart strategy for ensuring a successful harvest.
Actually, the cantaloupe plant is sensitive to cold temperatures and thrives in warm weather. By planting cantaloupe seeds indoors, typically about 2–4 weeks before the last expected frost in your area, you give your little plants a better chance of survival.
Begin by filling the container with seed-starting mix, leaving about half an inch of space at the top.
Now, sow seeds, 2–3 seeds in each container, planting them at about half an inch deep, and water gently.
Place your containers where they can get at least 6–8 hours of sunlight daily. If natural light is insufficient, fluorescent grow lights work well too.
Cover the containers with plastic wrap or a dome to create a mini greenhouse effect.
Keep the topsoil moist, and in about 5–10 days, you should see tiny cantaloupe seedlings sprouting with might!
2. Choose a Suitable Location for Your Seedlings
Selecting the right spot for growing cantaloupes is crucial for a successful harvest.
Cantaloupes love sunlight, and they need plenty of it to thrive. So, find a sunny location in your garden where they can bask in the sun for at least 6 to 8 hours a day.
Ideally, this spot should also be sheltered from strong winds, as cantaloupe vines can be a bit delicate, and wind can harm the vines and make it harder for the fruit to develop properly.
Furthermore, ensure that the location has good air circulation. It helps prevent diseases from taking hold of your cantaloupe patch.
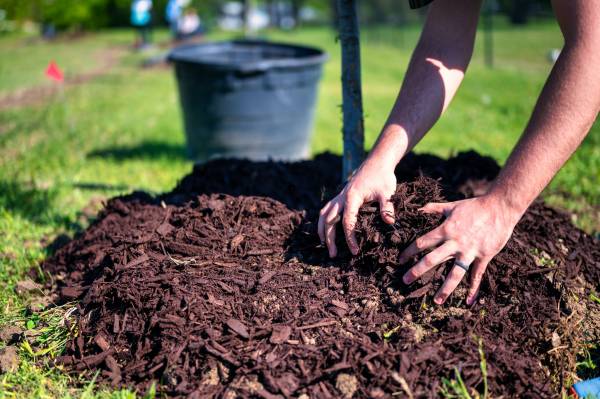
3. Prepare the Soil for Planting Cantaloupes
To prepare your soil for planting cantaloupes, start by testing it. You can find DIY soil test kits at many garden centers or have a professional test the soil for you.
Cantaloupes prefer well-draining soil that’s rich in organic matter. Organic matter can be added in the form of compost. Compost not only improves soil structure but also provides essential nutrients for growing cantaloupes.
If your soil is too heavy and doesn’t drain well, consider raising your planting area into mounds or rows. It helps improve drainage and keeps your cantaloupes’ roots from becoming waterlogged.
Before planting, remove any weeds or debris from the area. Weeds can compete with your cantaloupes for nutrients and water.

4. Plant Your Cantaloupe Seedlings
Once you have chosen the perfect spot and prepared the soil, it’s time to transplant your seedlings.
It’s a quicker start and less fussy, as they already had a bit of a head start.
Wait until the danger of frost has passed and the soil has warmed up, usually around the same time you direct sow seeds.
Dig a hole in your garden bed deep enough to accommodate the root ball of the transplant, and place the seedling in the hole.
Fill the hole with soil and gently pat it down to secure the transplant.
Remember to consider the space that the cantaloupes grow and need. These vines like to sprawl, so make sure you have enough room.
They can spread out quite a bit, so plan for about 3–4 feet between plants.
5. Provide Adequate Water to Cantaloupe Vines
Water is the lifeblood of your cantaloupe plant.
Cantaloupes need a consistent water supply to grow and produce sweet melons. It’s essential to water your cantaloupes properly to avoid both underwatering and overwatering.
Water your cantaloupes when the soil is dry to the touch about an inch deep.
In warmer climates, you might need to water every 2–3 days. While in a cooler climate or during light rainfall, you can space out watering more. The goal is to keep the soil consistently moist but not waterlogged.
One thing to keep in mind while watering cantaloupes is that they possess a shallow root system, so it’s best to water them at the base of the plant rather than overhead.
Drip irrigation or a soaker hose works well for this. It helps keep the leaves dry, which can reduce the risk of disease.
6. Mulch the Soil Around Your Cantaloupe
Mulching is like giving your cantaloupe plant a cozy blanket.
It helps keep the soil around them protected from the scorching sun and helps maintain moisture, which can be a game-changer for their growth and fruit production.
When the soil stays cooler and more evenly moist, your cantaloupe plant is happier and healthier.
Mulching also keeps the fruit clean.
When cantaloupes touch the soil, they can be more susceptible to rot and disease. Mulch acts like a barrier, so your melons stay fresh and healthy.
7. Fertilize Your Cantaloupes Regularly
Just as we need a balanced diet to stay healthy, the cantaloupe plants require proper nourishment to grow big and produce sweet melons.
Fertilizers provide essential nutrients that cantaloupe vines need to develop:
Strong stems
Healthy leaves, and
Delicious fruits
Start by understanding the needs of your cantaloupe vines.
They usually require a balanced fertilizer, which means it should have roughly equal amounts of nitrogen (N), phosphorus (P), and potassium (K). You can find these fertilizers at garden centers, often labeled with numbers like 10-10-10 or 14-14-14.
Before planting, mix some balanced fertilizer into the soil according to the package instructions. Once your cantaloupes start to grow and have several leaves, it’s time for more fertilizer.
Apply a side dressing of fertilizer a few inches away from the plants, then water thoroughly.
Throughout the growing season, repeat this process every 3–4 weeks.
Be sure not to over-fertilize, as too much can harm your plants.
8. Control Weeds Growing Around Your Plant
Weeds are like unwelcome guests at your garden party.
They compete with your cantaloupe vines for water, nutrients, and sunlight, and they can quickly take over if you don’t keep them in check.
Therefore, controlling weeds is like ensuring your cantaloupes have plenty of space and resources to thrive.
But what are the best ways to control weeds?
Mulching, which we discussed earlier, is one way to prevent weeds.
The mulch acts as a barrier, making it harder for weeds to grow through.
Regularly inspect your garden for any sneaky weeds that manage to poke through, and pull them out by hand.
Another method is using a hoe or a hand tool to gently scrape the soil’s surface. It disturbs the weed roots and makes it harder for them to grow back.
Be careful not to damage your cantaloupe plants while doing this.
Pro Tip: Remember, early intervention is the key to weed control. Regularly inspect your garden and remove any weeds as soon as you spot them.
9. Monitor for Pests and Diseases
Pests and diseases can severely harm your cantaloupe plants.
By monitoring for signs of trouble, you can catch issues early and take action to protect your sweet cantaloupes.
Inspect your cantaloupe plants regularly.
Keep an eye out for common pests like aphids, cucumber beetles, and spider mites. Look for chewed leaves, discolored spots, or wilting.
Also, watch for signs of diseases like powdery mildew or downy mildew. These often appear as white or gray powdery spots on leaves.
If you see these signs, it’s time to take action.
If you spot pests, remove them by hand or use natural remedies like neem oil or insecticidal soap.
For diseases, remove and destroy affected leaves or plants to prevent the disease from spreading.
10. Harvest the Fruit at the Right Time
Harvesting cantaloupes at the right time is like choosing the perfect moment to enjoy a ripe piece of fruit. It ensures that your melons are at their sweetest and juiciest, ready to delight your taste buds.
Harvesting too early means your cantaloupes may not be fully ripe and might not have developed their sweet flavor.
Contrarily, waiting too long, they can become overripe, losing their delicious taste and texture.
To determine if a cantaloupe is ready for harvest, look for these signs:
Color: The skin should change from green to beige, yellow, or orange, depending on the variety. The netting on the skin should become more pronounced.
Texture: Gently press your thumb into the blossom end (the end opposite the stem). If it yields slightly and has a fragrant aroma, it’s likely ripe.
Sound: Give the cantaloupe a gentle tap; it should produce a deep, hollow sound.
To harvest, use clean shears or a knife to cut the stem just above the cantaloupe. Be careful not to damage the fruit.
Growgardener’s Note: Once harvested, cantaloupes won’t continue to ripen, so it’s essential to pick them at their best level of ripeness!
That’s all for today.
Conclusion!
In conclusion, understanding the cantaloupe growing stages provides valuable insights into the intricate process of cultivating this beloved fruit.
The knowledge gained from these stages empowers growers to provide optimal conditions, including adequate irrigation, nutrition, and timely harvesting, ensuring the highest quality and flavor.
As we appreciate the artistry of cantaloupe cultivation, let us celebrate the dedication and skill required to nurture nature’s bounty, resulting in the delightfully sweet and refreshing cantaloupes we savor with every bite.
I hope you liked today’s post.
If so, make sure to share it with your friends and family.
Regards.