Tamarind is a perennial tree widely grown in Africa, the Indian subcontinent, and many other parts of Asia and Australia. Tamarind trees are slow-growing and evergreen. The leaves of these trees resemble Acacia leaves, featuring a bunch of tiny leaflets.
It produces yellow leaves and a tangy fruit enclosed in a shell. Tamarind fruit consists of sour fleshy fruit with stone-hard seeds enclosed in a long shell.
This guide will help if you want to learn how to plant Tamarind seeds in the soil.
It is savored in various dishes and drinks. Not only does the Tamarind provide a refreshing, tangy flavor, but it also adds to the aesthetic of your garden.
We have put together a helpful guide on how to plant Tamarind seeds just for you.
Let’s begin!

How to Plant Tamarind Seeds? | Step-by-Step Instructions!
Tamarind plant is native to warm climates though you can still easily grow it by starting the seeds indoors.
Since Tamarind seeds are enclosed in a hard shell, you’ll need to break it to expose the inner seed.
Our experts have compiled an excellent guide on how to plant Tamarind seeds and how to take care of them during and after germination.
Read on!
Step 1: Collect the Fruit
To plant the seeds, you’ll first need to collect the fruit.
- You can purchase Tamarind fruit from local or online markets.
- Crack open the fruit and remove the pulp from the inside.
- The seeds are hidden inside the pulp. Before planting, make sure all the pulp is thoroughly removed.
- Soak it in water to loosen the flesh to expose the seeds.
It is best advised to soak the seeds in warm water for at least one day to help them germinate.
Step 2: Crack the Seeds Casing
Once the seeds are separated from the pulp, you will notice a hard brown shell.
- Use a sharp knife to crack or cut the side of the shell slightly. (It will ease germination and make it faster.)
- After removing the seeds, please place them in a shady place and let them dry for a few days.
Now, move to the next step.
Step 3: Preparing the Potting Mix
Here’s how:
- Fill a slightly deep tray or small pots with your desired potting mix.
- Ensure the potting mix has good drainage and high nutrition to sustain the plant’s growth.
- Now plant the seeds at least half an inch deep into the soil.
- Make sure the seeds are buried a few inches apart to allow sufficient room for growth.
If you don’t want to use a commercial potting mix and want to make your own, here’s an article.
Step 4: Add Compost and Water
You’ll now need to take proper care of the seedlings.
- After planting the seeds, add a thin layer of compost.
- After adding compost, sprinkle some water to moisten the soil. (Do not overwater, as it will kill the seeds.)
As I mentioned before, Tamarind plants are native to warm habitats, so if you live in a colder place, it is best to use a heating mat and grow lights.
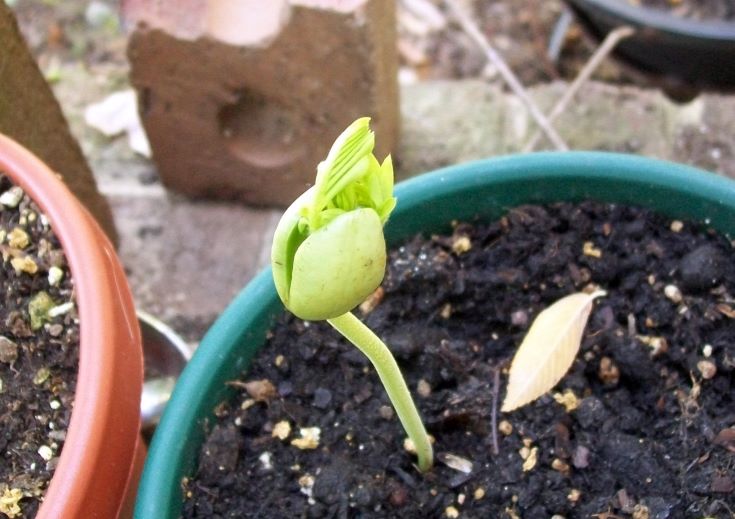
Step 5: Germination Time
Tamarind seeds grow quite slowly and may start emerging from oil somewhere between five to ten days.
However, it can take up to one month, so don’t be impatient. Keep them indoors, and do not expose them to direct sunlight during germination.
Step 6: Plant the Seedlings in the Garden
Once your seedlings have emerged, replant them in the garden, where there is ample room for them to grow fully.
If you keep the Tamarind plants in a container, chances are they might not grow to their full potential and will not bear fruit pods—you must plant the Tamarind trees in a garden to get the pods.
That’s all!
Here’s a video guide for you as well:
Now you know how to plant Tamarind seeds and grow amazing fruits.
Caring Tips for Tamarind!
After you plant the seeds, successfully germinate them, and replant them in the garden, you must take proper care of the plant and monitor it constantly.
After learning how to plant Tamarind seeds, follow these tips to take care of the tree.
- Once you have started growing the seedlings indoors, it is time to plant them in a larger space to allow the growth of roots—growing in small containers will limit their growth rate.
- At the germination stage, avoid exposure to direct sunlight; however, once the plants have started growing, ensure they receive plenty of direct sunlight.
- At the growing stage, keep the soil of the plant moist. But as the plant grows taller, limit watering and only water when the top one or two inches of soil feels dry.
- Fertilize the plant to provide it with proper nutrition for healthy growth and richer fruits. Use a 6-6-3 fertilizer every two to three months. Do not over-fertilize.
- Also, add a thin layer of compost and cover the soil with mulch. Cover at least 6 inches of the area around the tree stem.
Once your seedlings are grown into healthy and happy plants, it’s time to harvest them.
Harvesting Tamarind Fruit!
The best time to harvest Tamarind fruits is from January to April.
The Tamarind trees grown from seeds can take 7 to 8 years to produce the Tamarind fruits. The trees grown from buds or cuttings yield much faster results and will start bearing fruit in 4 to 5 years.
Uses of Tamarind
Tamarind fruit is consumed in so many ways.
- Not only the fruits but the leaves are consumed as well.
- Tamarind is a tangy, refreshing fruit used in many sauces, jams, syrups, drinks, foods, and juices.
- Not only is it famous for its culinary uses, but it is also very widely used for its medicinal application.
And we’re done for today.
Conclusion!
Tamarind is a very popular fruit in the African and Asian continents.
Though this plant is native to warmer climates, it can still be grown anywhere with proper care.
Our guide covers the basic instructions as well as the caring tips on how to plant Tamarind seeds.
This fruit can be enjoyed in several ways and make an excellent refreshing drink that is not only delicious but also packed with electrolytes and many health benefits.
Please share with us how your fruit turned out and how you like to consume it in the comments below!
Regards.